本文作者张世博。
本文最先发表在微信公众号“奔波儿灞的水帘洞”。
本站转载已获得授权。
震惊!用脸蹭开宿舍大门!树莓派人脸解锁打开宿舍门!
在上一篇文章中(我竟然给南航全体大二学生的颜值做了一个大排名?点进来查看结果!(附源码),我发现了百度开发者提供的API还有人脸对比的功能,只需在使用之前,将要添加的人脸照片上传到人脸库之中即可。加上之前在知乎看到了一篇使用手机蓝牙解锁宿舍门的文章,这次便萌生了人脸解锁打开门的想法。
这次本项目由两个部分构成
- 树莓派人脸识别
- arduino舵机开门
这两个部分之间的通讯使用树莓派自带的蓝牙,arduino加上hc06蓝牙模块。设备外壳使用3D打印构造。
树莓派人脸识别
在这个部分,将写好的Python文件设置为开机启动,同时在Python文件内设置定时重启以防内存溢出。
代码逻辑为:
- 若相似度大于预期,则通过蓝牙发送相应指令给Arduino
- 循环
大约就是这个样子,代码逻辑并不是很难理解,代码内容在后面会附上。
Arduino舵机开门
这边代码也不是很难理解。
代码逻辑为:
- 检查蓝牙串口是否有值,如果有则下一步,没有则循环
- 有输入值,监测是否为对应值,如果是,打开继电器和舵机5s
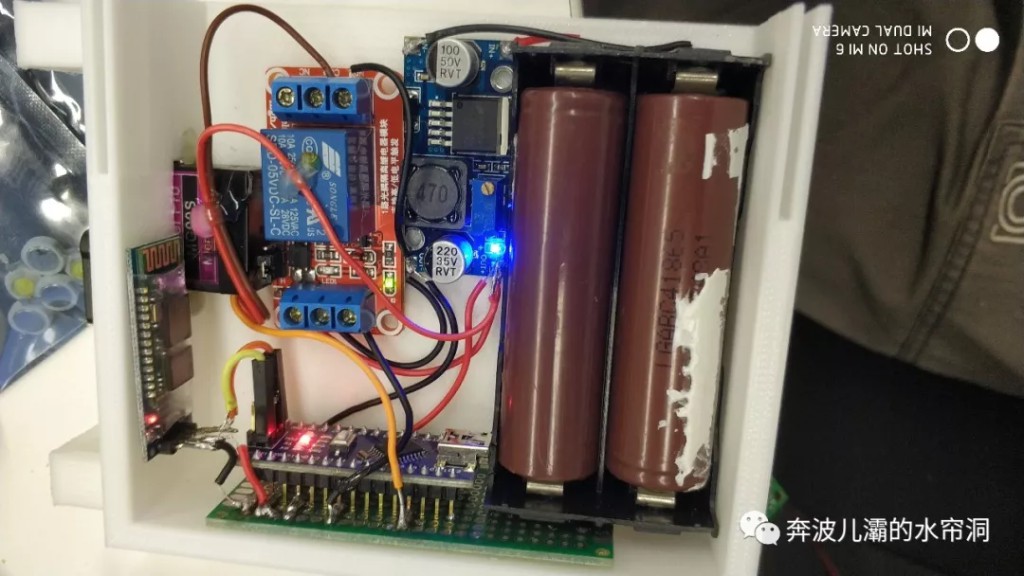
Arduino部分主要困难的是硬件部分。为了达到节省电源电量,同时保持系统长时间运行的目的,在没有信号输入的时候,通过继电器来关闭舵机的电源输入;在有输入的时候才打开继电器,连接舵机电源进行操作。
舵机开门部分的电路逻辑为:
18650两节(7.4v)→稳压变压(5v)→Arduino→继电器信号
↓ ↑
→→→→→蓝牙模块
↓
→→→→→继电器供电→→→→→舵机
其中舵机受到Arduino信号控制,图中没有标明。
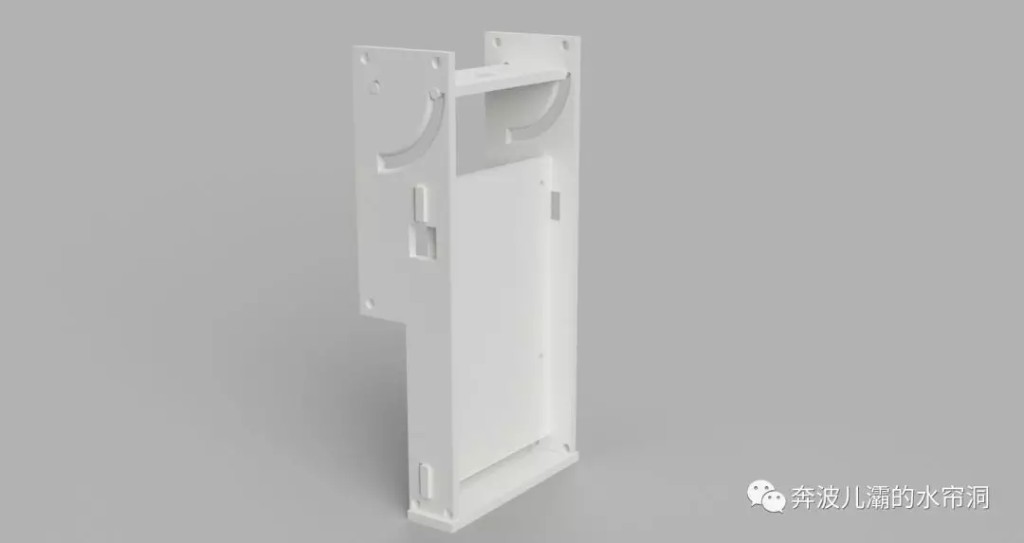
3D打印部分
主要是打印树莓派和舵机部分的支撑支架。
舵机部分,略
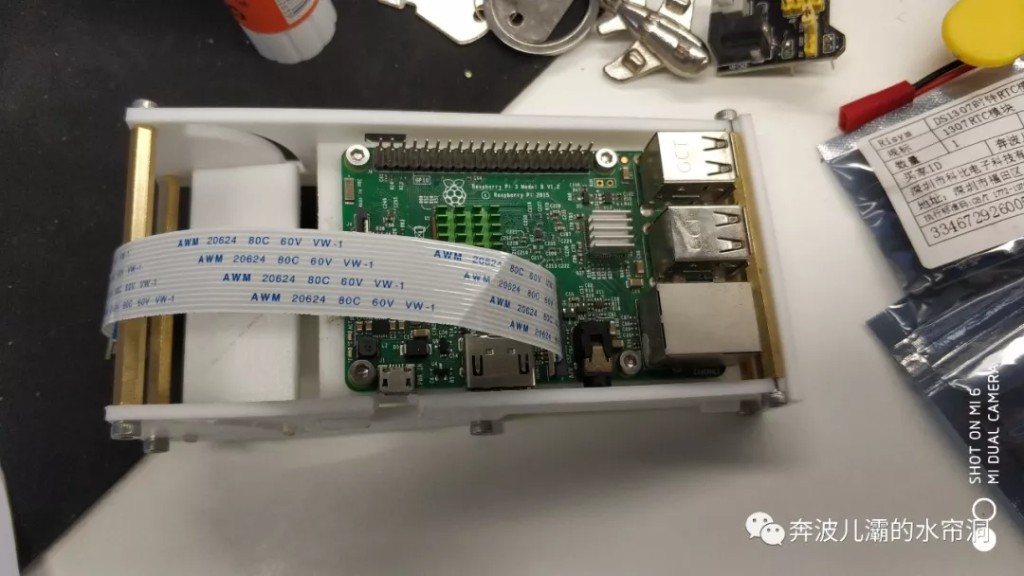
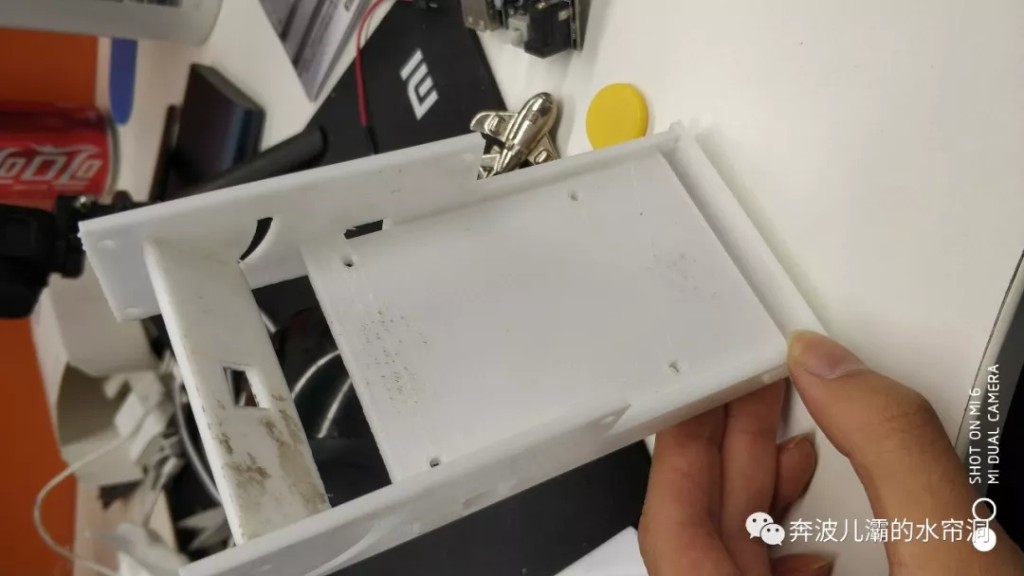
实物图片
使用视频
感谢舍友的亲情出演
点击查看完整视频
代码部分
树莓派Python
1
2
3
4
5
6
7
8
9
10
11
12
13
14
15
16
17
18
19
20
21
22
23
24
25
26
27
28
29
30
31
32
33
34
35
36
37
38
39
40
41
42
43
44
45
46
47
48
49
50
51
52
53
54
55
56
57
58
59
60
61
62
63
64
65
66
67
68
69
70
71
72
73
74
75
76
77
78
79
80
81
82
83
84
85
86
87
88
89
90
91
92
93
94
95
96
97
98
99
100
101
102
103
104
105
106
107
108
109
110
111
112
113
114
115
116
117
118
119
120
121
122
123
124
125
126
127
128
129
130
131
132
133
134
135
136
137
138
139
140
141
142
143
144
145
146
147
148
149
150
151
152
153
154
155
156
157
158
159
160
161
162
163
164
165
166
167
168
169
170
| from picamera import PiCamera
import time
import requests
import base64
import RPi.GPIO
import serial
import sys
import os
def getaccess_token():
host='https://aip.baidubce.com/oauth/2.0/token?grant_type=client_credentials&client_id=t7NNK8h4xGoAHuTpbwyo9qYC&client_secret=MBg0AK0PhiOhytA35rSQbSa4boIQsdz3'
header_1 = {'Content-Type':'application/json; charset=UTF-8'}
request=requests.post(host,headers =header_1)
access_token=request.json()['access_token']
return access_token
def take_picture():
camera.start_preview()
time.sleep(0.5)
camera.capture('image.jpg')
camera.stop_preview()
def open_pic():
f = open('image.jpg', 'rb')
img = base64.b64encode(f.read())
return img
def go_api(img,access_token):
data_1 = {"image":img,'group_id':'asd'}
params_1 = {'access_token':access_token}
header_2 = {'Content-Type':'application/x-www-form-urlencoded'}
pic_re=requests.post('https://aip.baidubce.com/rest/2.0/face/v2/identify',params=params_1,headers=header_2,data=data_1)
print(len(pic_re.text))
if len(pic_re.text)>130:
if pic_re.json()'result''scores'>66:
print(pic_re.json()'result'['scores'])
return ('yes')
else :
return ('no')
else:
print('error')
return ('no')
def led():
RPi.GPIO.output(18, True)
def send():
serial.write(bytes(2, 'UTF-8'))
print('发出指令成功')
serial.flushInput()
def try_api(img,access_token):
try:
a=go_api(img,access_token)
if a=='yes':
led()
send()
time.sleep(10)
RPi.GPIO.output(18, False)
if a=='no':
pass
except:
pass
if name == 'main':
os.system('sudo rfcomm bind 0 00:21:13:01:8E:1A')
RPi.GPIO.setmode(RPi.GPIO.BCM)
RPi.GPIO.setup(18, RPi.GPIO.OUT)
port = "/dev/rfcomm0"
serial = serial.Serial(port,9600)
count=0
camera = PiCamera()
access_token=getaccess_token()
while True :
take_picture()
img=open_pic()
try_api(img,access_token)
count=count+1
print(count)
if count == 2000 :
os.system('sudo reboot')
count = 0
|
Arduino
1
2
3
4
5
6
7
8
9
10
11
12
13
14
15
16
17
18
19
20
21
22
23
24
25
26
27
28
29
30
31
32
33
34
35
36
37
38
39
40
41
42
43
44
45
46
47
48
49
50
51
52
53
54
55
56
| #include<Servo.h>
Servo myservo;
void setup()
{
Serial.begin(9600);
myservo.attach(9);
myservo.write(10);
pinMode(4,OUTPUT);
digitalWrite(4, HIGH);
myservo.write(0);
delay(10000);
}
void loop()
{ digitalWrite(4, LOW);
while(Serial.available())
{ char c;
c=Serial.read();
Serial.println (c);
if (c = 2)
{ digitalWrite(4, HIGH);
myservo.write(180);
delay(40000);
myservo.write(0);
delay(10000);
digitalWrite(4, LOW);
}
}
}
|
STL打印文件下载链接:https://github.com/h1997l1997/Face-recognition-door-lock-in-raspberry-pie/tree/master/STL
End